
DIY Kayak Musky Box - Alicia Joy Outdoors
DIY Kayak Musky Box
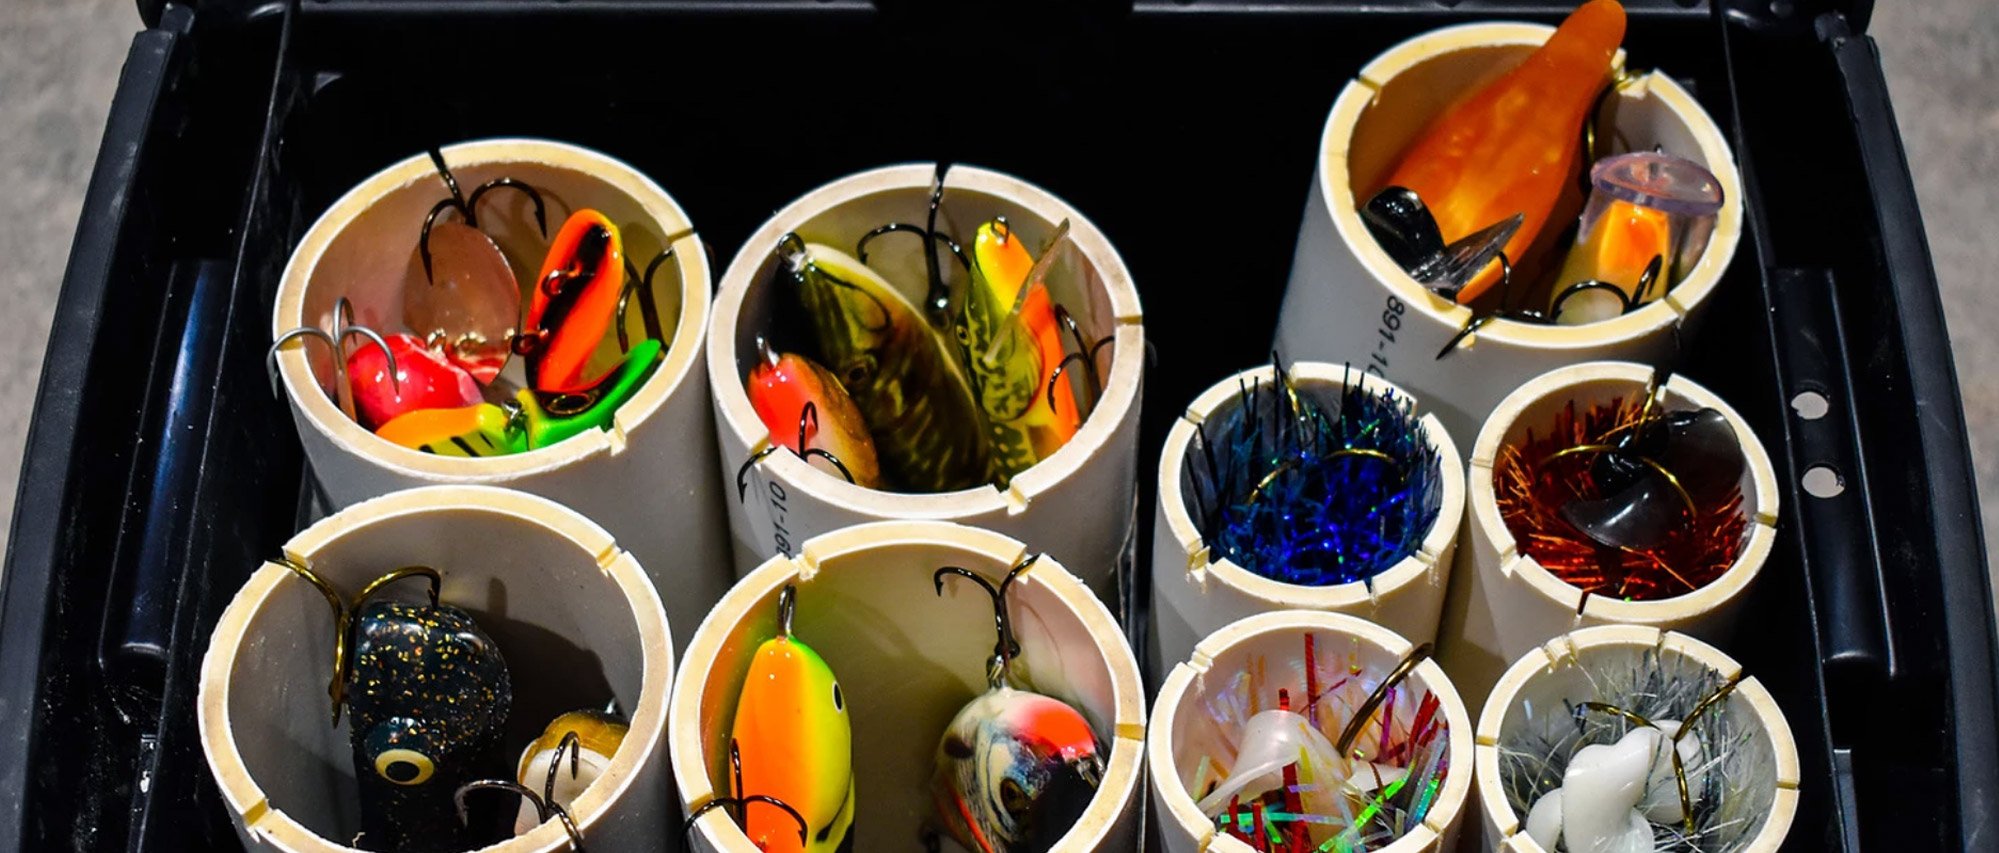
Musky anglers know all about the expense that comes with the addictive sport and how quickly tackle boxes fill up. Bringing multiple boxes that are filled with lures is not an issue while in a boat. However, when it comes to fishing from a kayak there is an obvious decrease in space, which is why I decided to create my own customized box - (with a little help.) Building your own musky box will also save you a ton of money. To build your own musky tackle box, big or small, follow the steps below.
Materials Needed
- container with a lid (size is up to you)
- 2 sizes of PVC pipe (example: 2" and 3")
- duct tape
Tools Used
- chop saw
- bandsaw
- tape measure
- pencil
- cordless drill with 1/4in. drill bit
The Build
- Use a cordless drill and drill bit to make 4-5 holes in the bottom of the box so water can drain out.
- Measure the depth of your box to determine the length of the PVC pipe. Leave space between the box lid and the PVC pipe. We subtracted 1 inch from the total depth of the box.
- Measure, mark and cut the PVC pipe. (we used a chop saw for this step)
- Optional - use a bandsaw to cut 4 grooves in the top of each pipe to keep lure hooks in place
- Arrange the PVC pipes to your liking and to fit your box
- Once you determine the layout, use duck tape to secure the pipes together to form the inside of the box. (I recommend taping the top and bottom to keep the tubes more secure)
- Lastly, I had holes drilled in the sides of my box in order to strap it onto my kayak. This step will vary depending on the size of your box, style of kayak, and the method you choose to secure it in place.
The container I chose for my kayak was based on size, weight, storage, and accessibility. The size of the container will fit perfectly behind the Hobie chair and is lightweight for easy transportation. (The handle is also a plus) The container can hold a variety of lures and has extra space in the back for additional baits to be hung. Also, the container has a lid that latches and has storage for extra leaders, pliers, hook sharpener, etc.
I hope this article will help you save money by putting together your own musky box. Please comment below with any questions, I look forward to hearing from you. Opener is right around the corner; best of luck this season! Until next time, enJOY the outdoors.
source: Alicia Joy Outdoors